Fuzzy Matching Salesforce Leads to Accounts with Python

Common problem in Salesforce world: you want to bulk convert some Leads but you don’t know which ones are already related to existing Accounts. You can’t just bulk convert and create tons of duplicate accounts, and you have way too many leads to manually search for and create each account if needed. I recently encountered this problem and used a bit of Python and a great fuzzy matching library, FuzzyWuzzy, to solve it.

There are many ways to solve this problem, ranging from 3rd party AppExchange products to custom Apex classes. However there is a major limitation of Apex and that is support for pattern matching. So for me, using Python and Dataloader is the simplest path and allows me to use great tools like FuzzyWuzzy.

The script will try a couple of different ways to match the Lead to the account:

  • It will extract the domain from the Account.Website field and compare it to the domain from the Lead.Email field. An improvement would be to also check the Lead.Website field against the Account.Website field. If these match, we skip the next step.

  • It will perform a fuzzy match on the Account.Name and Lead.Company field using FuzzyWuzzy’s token_set_ratio function. You can play with different match functions and ratio thresholds, but I found this one to work best. Below the 100% threshold I had too many false positives.

Here’s the basic steps to make it work.

  • First, add a custom lookup field to your Lead object called ‘Related Account’. When we match an existing Account to a Lead, we will ultimately store the match here.

  • Next, extract all of your Account data to a CSV file using the Salesforce DataLoader. You need the Id, Name and URL, at a minimum.

  • Extract the Leads you want to match into another CSV, and include the Id, Name and Email.

  • Run the script below and redirect the output to a CSV which will contain the Lead ID and the matched Account ID.

  • Use DataLoader to update the Lead objects, setting the new custom field you created with the Account Id that matched to the Lead.

  • You are now ready to bulk convert using some Apex scripting. A good overview of how to do that is to review the Database.convertLead() Apex method. This makes it east for your Apex code to check for a value in the Lead.Related Account field – and merge instead of creating a new Account.

Here’s the example Python script below.

#/usr/bin/python3

import csv 
from urllib.parse import urlparse
from fuzzywuzzy import fuzz 

#function to extract the domain name from an email address (foo@foobar.com > foobar.com)
def extractDomainFromEmail(email):
   return email.split('@')[1]            

#extracts the domain name from a web site URL (https://www.foobar.com > foobar.com)
def extractDomainFromWebsite(website):
   t = urlparse(website).netloc
   return '.'.join(t.split('.')[-2:])

#extracts from your SF instance. Make sure to include Ids, Name, Email and Website fields for Accounts and Leads
accounts_file = 'accounts-extract.csv'
leads_file = 'leads-extract.csv'

dict_accounts = []
dict_match = []

#just used to keep track of how many matches we get
match_count = 0

#read accounts to a dictionary
with open(accounts_file, mode='r') as af:
   accounts_dict = csv.DictReader(af)
   
   for row in accounts_dict:
      
      #as we read in the rows, strip the web site field to a domain if present
      website = str(row['Website'])
      
      if (website != ''):
         row['Website'] = extractDomainFromWebsite(website)
      
      dict_accounts.append(row)

#iterate each lead, trying to find a match on the account
with open(leads_file, mode='r') as lf:
   
   leads_dict = csv.DictReader(lf)
   
   for leadRow in leads_dict:

      leadMatch = False
      
      #extract the email domain of the lead to check against the account's domain
      emailDomain = extractDomainFromEmail(leadRow['Email'])
            
      for accountRow in dict_accounts:

         matched = False
         
         #try to match the email domain to the URL for the account 
         if (emailDomain ==  accountRow['Website']):
            matched = True
         else:    
            #perform a fuzzy match on the Company field vs. Account Name
            ratio = (fuzz.token_set_ratio(str.lower(leadRow['Company']),str.lower(accountRow['Name'])))
         
            if (ratio == 100 ):
               matched = True
               
            #if you want to see what some near matches look like, uncomment this 
            #elif (ratio > 95):
            #  print('No Match: Ratio:'+str(ratio)+' - '+leadRow['Name'])

         if(matched):
            match_count += 1
            leadMatch = True
            break
         
      if(leadMatch == True):
         #uncomment to view the actual matched row
         #print('Matched Lead:'+leadRow['Name']+' - '+leadRow['Company']+' - Account Name: '+accountRow['Name'])
         
         # add a row to the output dictionary with the Lead ID and Account ID to update.
         matched_dict = {'LeadId': leadRow['Id'],'AccountId': accountRow['Id']}  
         dict_match.append(matched_dict)

#uncomment to see how many matched
#print('Matched: '+str(match_count))

#print the csv file
print('LeadId,AccountID')

for outRow in dict_match:
   print(outRow['LeadId']+','+outRow['AccountId'])
         

Build a Web App with Python, Flask and AWS Elastic Beanstalk

Flask is a popular framework for building lightweight server-side web applications with Python. As an antidote to the more complex and fully-featured siblings such as Django, Flask excels with a minimal footprint, intuitive MVC-style routing and view controls, and a host of thoughtful plugins for things like SQLAlchemy.

In this article we’ll review my experience building a single-page Flask app and deploying it to AWS Elastic Beanstalk (EB), Amazon’s single-click scale-out application server. AWS EB orchestrates everything from spinning up an EC2 instance to setting up load balancing to configuring alerts and monitoring, all from a single command.

If you wish to take a look at the source code you can find it here: https://github.com/Sassberto/MP-GPX/

The example application can be found here: http://gpx.ridgeline-analytics.com/

As with all good programming projects I had an itch to scratch.  In my spare time I enjoy rock climbing and mountaineering, and I use a site called MountainProject.com to identify, select and  research potential climbing routes.  The site has a handy feature which allows me to add routes to a todo list, where I can easily find them later.  This route data has all sorts of stuff, but most important is the latitude and longitude of the climb itself.

My todo list on MountainProject. Doesn’t do me much good if I’m not online…

I needed to get this location data off the web site and onto a GPS device, or smartphone GPS app, so I could use it offline when I’m in the field and out of cell reception.  
There’s no really good way to do this with the web site, so enter the Mountain Project Data API:  https://www.mountainproject.com/data.vvI figured I could fetch my todo list, get all the routes on the list and their GPS data, and create a GPX file that could uploaded to my GPS device and would work offline.

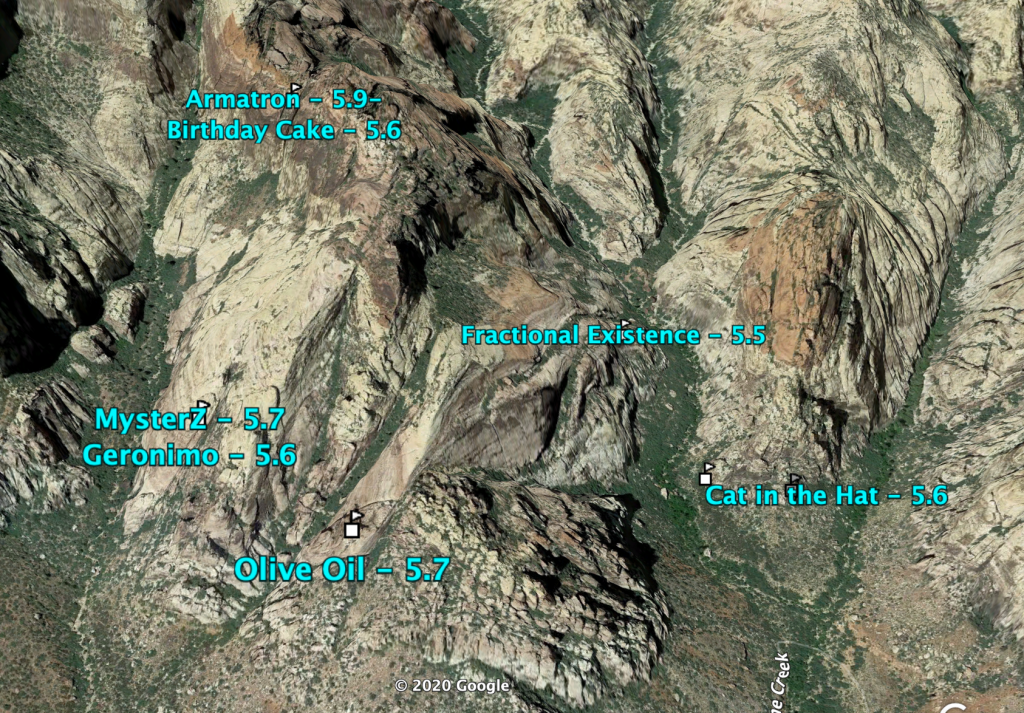
Example of the GPX file loaded into Google Earth – Red Rock Canyon, Las Vegas NV

Thankfully there is a Python library called gpxpy https://pypi.org/project/gpxpy/ which seemed to be the ticket.  This library would allow me to create a GPX file with tracks and waypoint data.  By mapping the API fields from MountainProject to the gpxpy object, I could send a GPX file to the end user’s device, which could now work offline.

The first step is to set up the development environment.  This is important to get right if you are going to use Elastic Beanstalk or want to package your app for automated deployment on a WSGI server.  Later we are going to look at the EB command line utility, but for now, set up your application something like this, with your flask app in the application.py file. 

Install Flask and gpxpy using pip, then use pip freeze > requirements.txt to hold the external dependencies list for EB.  You’ll also want to use git as the EB CLI allows you to deploy directly from a git repo, package to a zip, upload, and deploy all in one go.

Example of requirements.txt

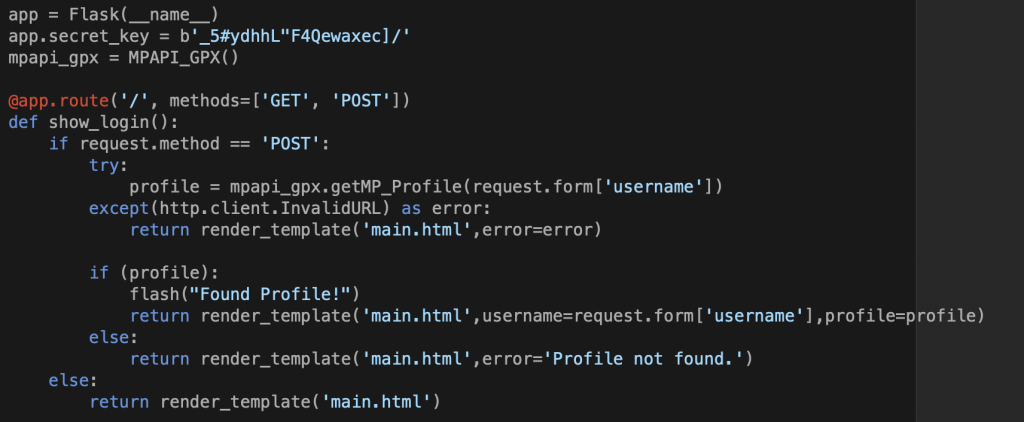
Creating the basic Flask app shell using the excellent tutorial is enough to get started. Rigging routes to the controller and passing request variables is really handled very nicely. I figured I needed a form and a results page.  In my first iteration I just served the file on form submit, but that didn’t give the end user much feedback, so I switched to two views, a form view and a results view. 

application.py contains all the view logic and application routing.

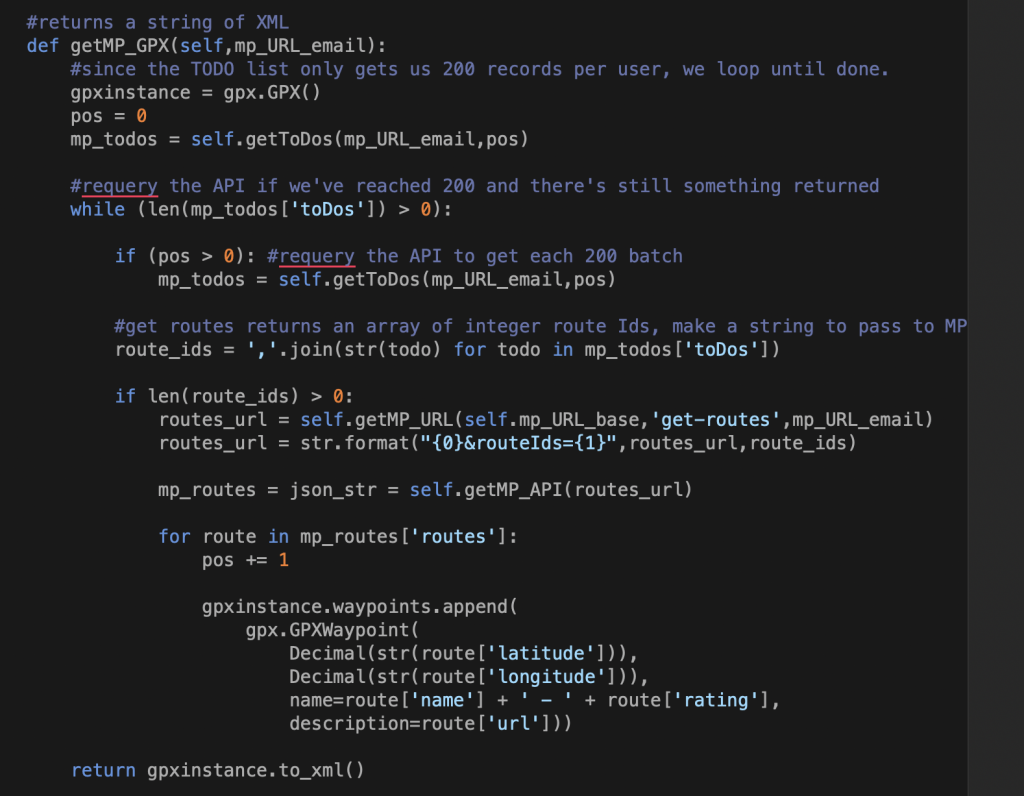
The MountainProject.com API was pretty simple, it returns JSON which I passed mostly back as strings or lists.  It’s pretty easy to map this to gxpy as you see below.  I elected to send the XML as an attachment to the request vs. write it to a temp file, it just seemed cleaner with no temp files to delete.   I used very little of Bootstrap to implement some styling and the built-in javascript validation.

The main function that gets Lat / Long from the API and makes GPS waypoints.

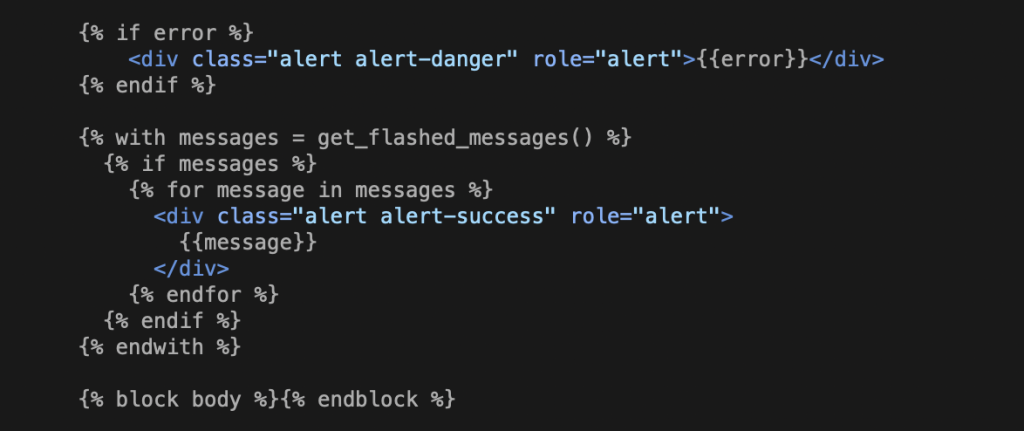
Jinja2 templating is clean and and allows for nested templates and layouts.  I just used a single template with minimal show & hide UI logic.  It worked well with Flask’s message-flashing feature that allows for snappy UI responses.   You can also use the built-in development server for Flask, which will auto-restart when it detects a code change – very nice indeed.

Jinja2 template block for showing info and error messages.
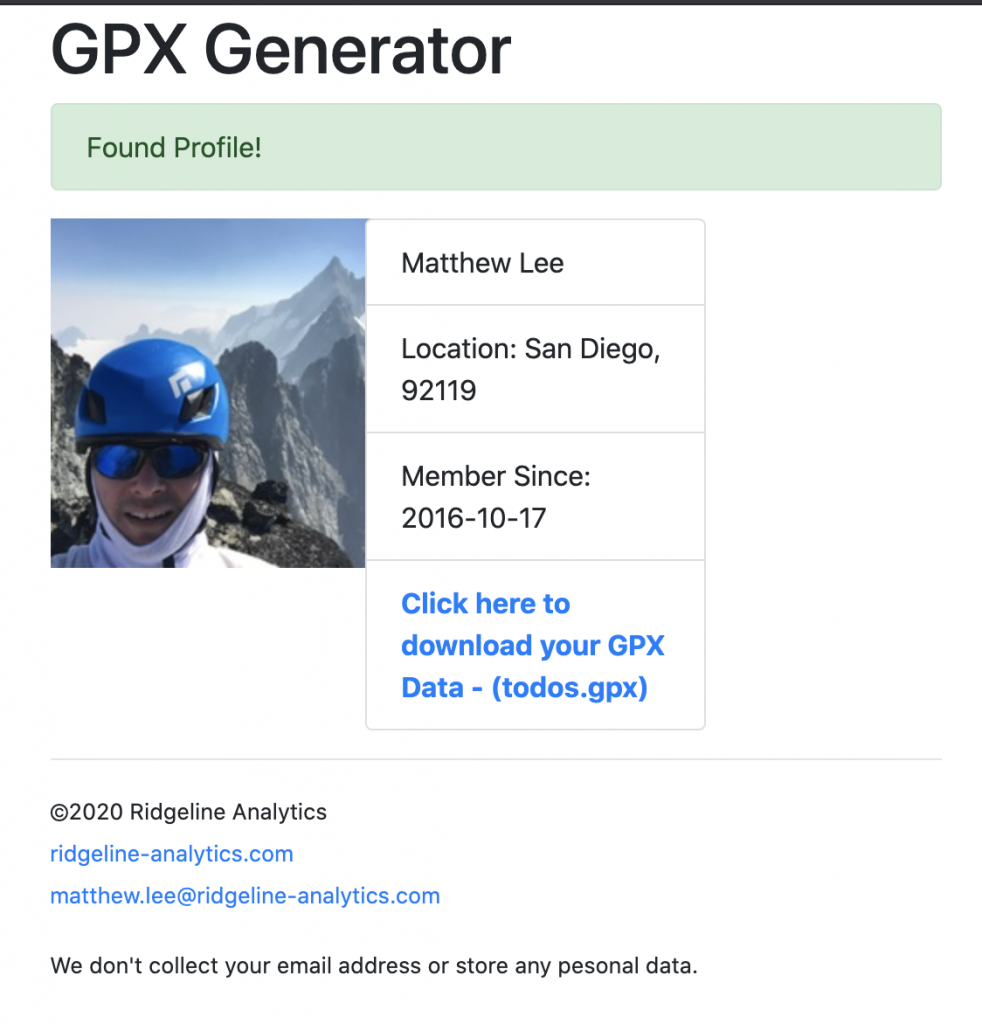
The GPS Generator in action, showing flashed messages and dynamic content.

Finally it was time to deploy this thing on EB.   EB is essentially a series of scrips that manage a virtual environment.  These environments can put up a scale-out web server infrastructure in just a few minutes.  As you can imagine they are very sensitive to configuration so you’ll want to get familiar with finding the logs in the AWS console. I won’t  get into the details, but you can find comprehensive info here:https://docs.aws.amazon.com/elasticbeanstalk/latest/dg/create-deploy-python-flask.html

Just commit your code and run eb deploy – the rest is done for you.

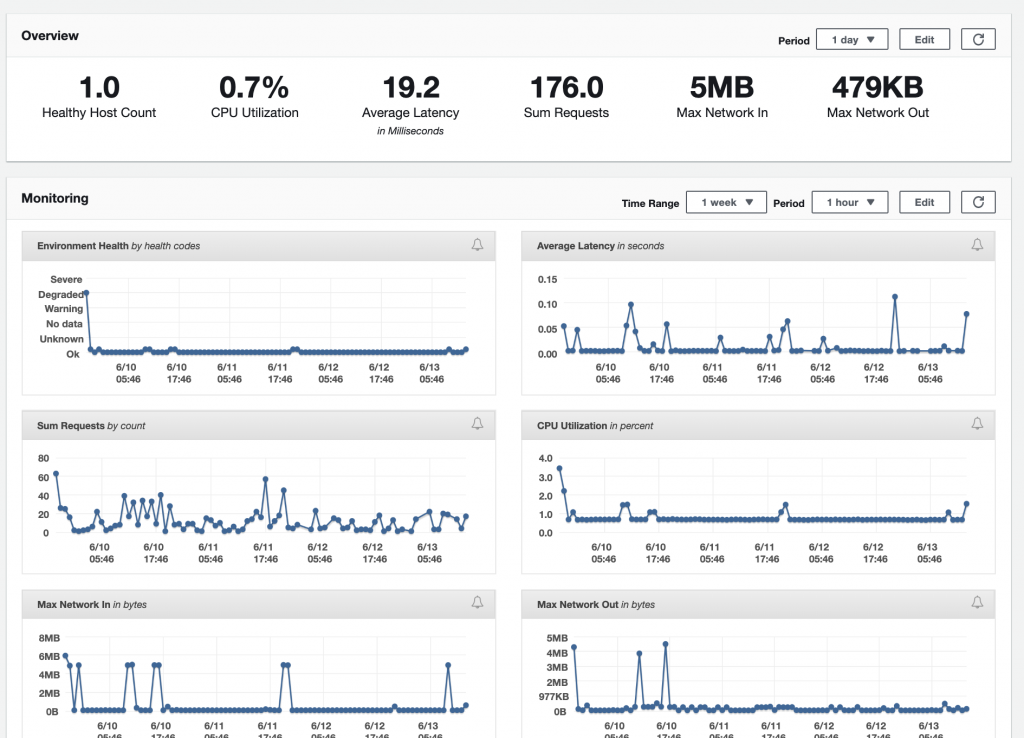
Once up and running managing the EB instance is very simple, and you can configure monitoring and alerts.  Setting up DNS and SSL would be a logical next step and requires a bit more technical work.   If millions of people somehow wanted to download their todo lists as GPS files, this would be a fantastic set up for a cloud-based application that needs scalability.

AWS Cloudwatch metrics up and running automatically. You can add lots more.